
Want to keep malicious bots and spammers off your WordPress site? You are not alone.
Every WordPress site owner dream of a spam-free website, CAPTCHA is one of the most effective and popular WordPress anti-spam solutions.
CAPTCHA stands for Completely Automated Public Turing test to tell Computer and Human Apart.
As the name implies, it’s a user verification measure that adds an extra layer to your WordPress security as it denies bots access to your website.
In this guide, you’ll learn how to use WordPress CAPTCHA to secure your website in multiple ways.
Frequently Asked Questions
Is reCAPTCHA Still Free?
Yes. reCAPTCHA is a free service by Google to protect websites from spam and abuse.
It uses a Turing test to separate human users from bots. The CAPTCHA test uses advanced machine learning and risk analysis to check for human-like behavior in website visitors.
This prevents abuse of forms and comments sections of WordPress websites.
What is the Best reCAPTCHA Plugin for WordPress?
From our experience, the best reCAPTCHA plugin is the Google reCAPTCHA by BestWebSoft. This plugin works with almost all WordPress forms.
So instead of adding reCAPTCHA to individual forms, by using this plugin, you can bulk add reCAPTCHA to all forms on your website.
What You’ll Need to Enable WordPress CAPTCHA
- A WordPress CAPTCHA Plugin: There are many WordPress CAPTCHA plugins. A search in the WordPress plugin directory will spoil you with options. What you should consider before selecting is whether the plugin is compatible with your version of WordPress and supports the forms you have on your website.
- A WordPress Form that Supports CAPTCHA: Before you can enable WordPress CAPTCHA, the form plugin on your website must also support reCAPTCHA. All popular form plugins have this feature. We’ll show how to add CAPTCHA to 2 of the most used form plugins, Contact Form7 and WPForms.
- A Google Account: reCAPTCHA is a free Google service. And to use any Google service, free or paid, you must have a Google account. So having a Gmail account is all you need.
- CAPTCHA API Keys: The CAPTCHA API key contains a Site Key and a secret key you get from Google after setting up a reCAPTCHA account. Whether using a dedicated reCAPTCHA plugin or adding reCAPTCHA to particular form plugins on your website, you’ll need these API keys.
- WordPress Admin Access: Modifying any part of a WordPress website requires admin access. Of all the six roles in WordPress, only a user with admin or super admin permission can enable WordPress CAPTCHA.
How To Enable WordPress CAPTCHA
There are methods to enable WordPress CAPTCHA.
- Method 1: Using a CAPTCHA Plugin
- Method 2: Using a Form plugin
Whichever method you choose, you need the CAPTCHA API keys. To get these keys, you first must register your site for reCAPTCHA with Google.
How to get API keys (Site key and Secret key) for WordPress CAPTCHA
Visit the Google reCAPTCHA website. This will automatically take you to the CAPTCHA console if you already have a Google account in your browser.
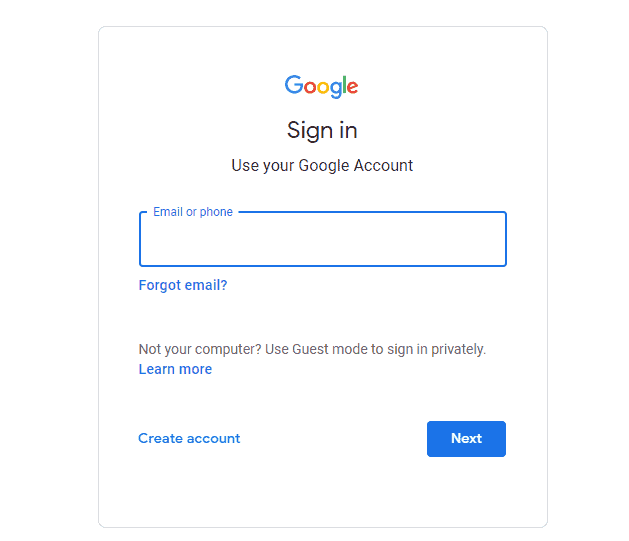
If you don’t, you’ll be prompted to Sign in with your Google account or to Create account. Check out this guide on how to create an email account.
Once you have your Google account, type it in and click the Next button.
The first field you’ll see on the CAPTCHA registration page is the Label field.
You can use any name of your choice as the label. However, we recommend making it descriptive for easy identification in the future.
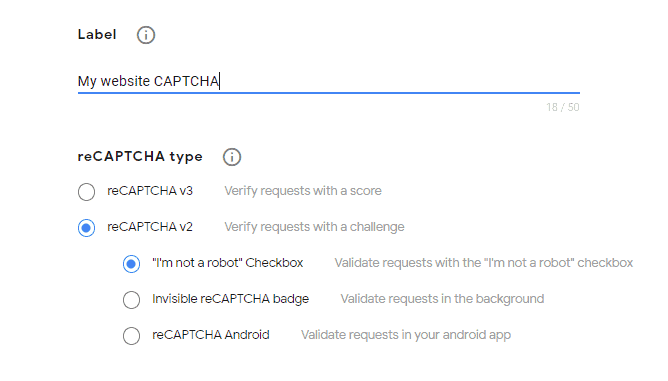
Next, scroll to the reCAPTCHA type section to select the CAPTCHA you want on your WordPress website.
There are two options here. reCAPTCHA v3 and reCAPTCHA v2. First, we’ll select the most used and reliable option, version 2.
So click on the reCAPTCHA v2. You’ll see three options with a brief description of what each does in a brace.
First, we’ll choose the reCAPTCHA v2 ( “I’m not a robot” Checkbox). You can learn more about reCAPTCHA versions here.
Next is the Domain field to add the address of your WordPress website. You can add more than one website here.
Click the Plus icon to continue adding the website until Google says enough.
You can use this single CAPTCHA account on as many websites as possible.
So you don’t have to create one for every website you own.
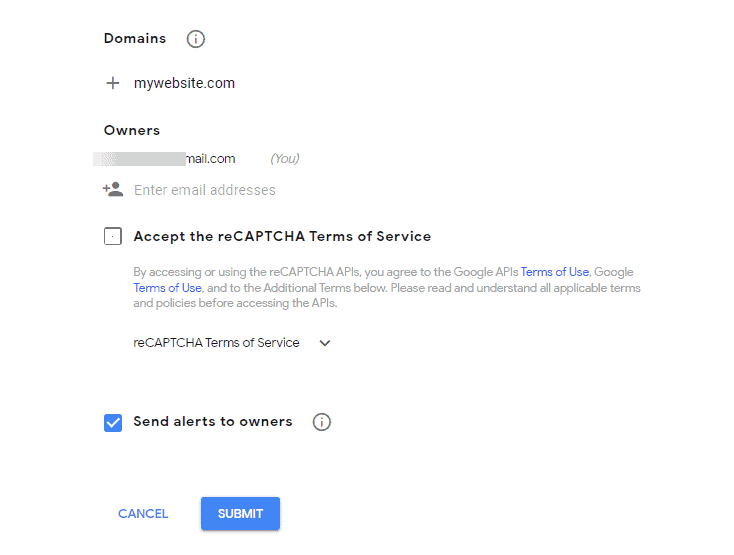
Next on the page is the owner section. Here, you’ll see your email account is already filled in.
If you’d like to add more emails, click the Plus Profile icon at the bottom.
Under it, accept the CAPTCHA policy by checking the Accept the reCAPTCHA Terms of Service box.
If you’d like to receive user engagement notifications, tick the Send alert to owners box.
In addition, Google will notify you anytime it detects suspicious actions on your site.
After that, click the SUBMIT button. Google will register your site and take you to the CAPTCHA admin console.
This is where you’ll see reCAPTCHA API keys, Site, and Secret keys. Copy and save both keys somewhere. You’ll need them in a moment.
And if, perchance, you misplaced the code, you can always log in to your reCAPTCHA admin console to retrieve them.
Now that your reCAPTCHA API keys are ready Let’s show how to enable WordPress CAPTCHA using the 2 methods.
Method 1: Using a CAPTCHA Plugin
Method 2: Using a Form plugin
Method 1: Enable WordPress CAPTCHA Using a CAPTCHA Plugin
To enable WordPress CAPTCHA on the default login and registration page, you’ll need to install a plugin called CAPTCHA 4WP plugin.
If you need help, check out this step-by-step tutorial on how to install WordPress plugins.
Once you install and activate the plugin, follow these steps.
Activating the plugins will automatically add a new tab to the left panel of your admin dashboard.
So go to the panel, locate and click on CAPTCHA 4WP. This will open the CAPTCHA configuration page.
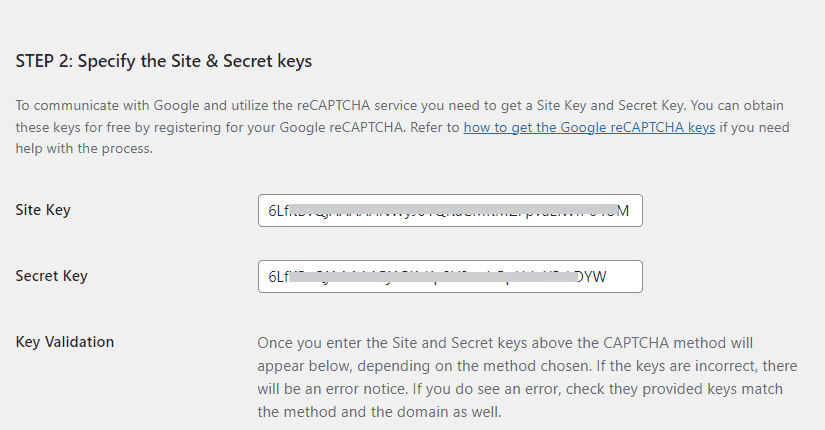
The first step on the page is to select the CAPTCHA version.
Since we selected reCAPTCHA v2 ( “I’m not a robot” Checkbox) when registering our site, we’ll do the same here.
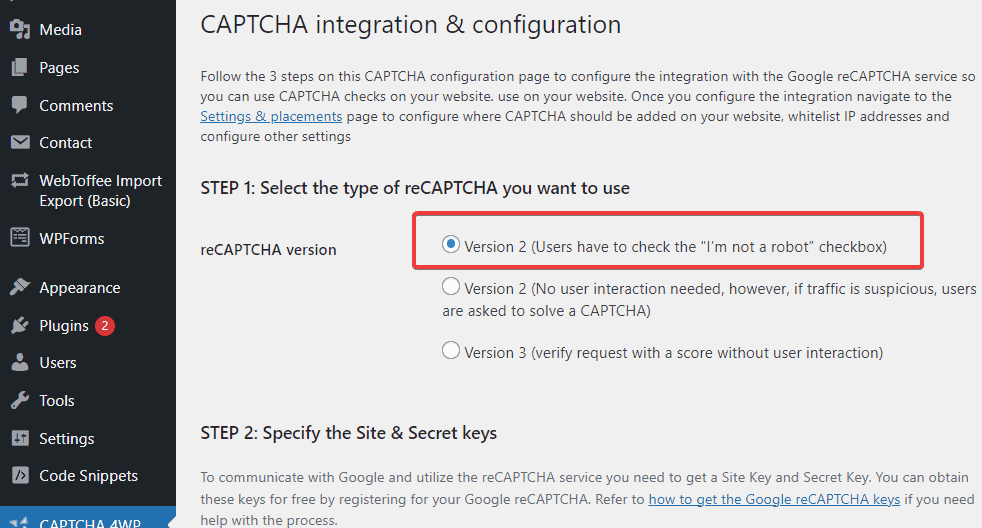
So, select Version 2 and scroll to step 2. Copy and paste the API keys from Google into their respective field.
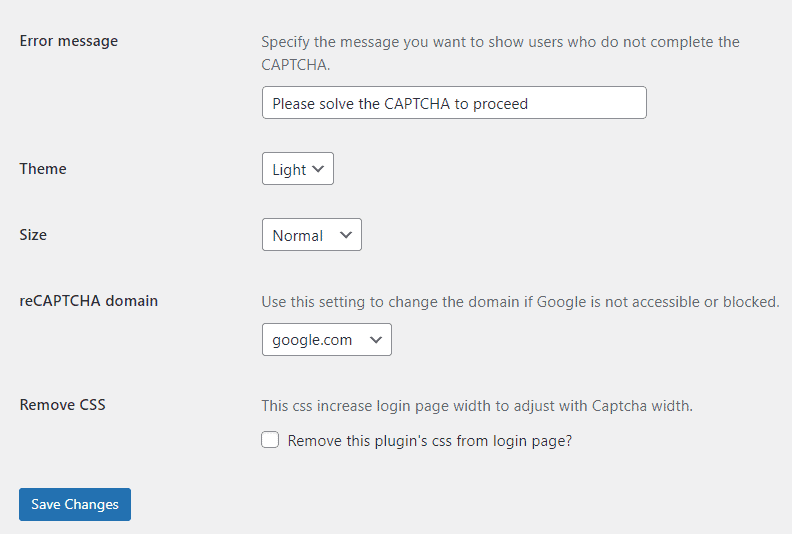
Step 3 is where you customize reCAPTCHA to your preference.
For example, you can change the language CAPTCHA language, customize the Error message users will see when they fail the CAPTCHA test, and set the theme of your CAPTCHA to either dark or light.
Once satisfied with your settings, click the Save Changes button to apply them.
Now, specify what forms on your website will have the CAPTCHA test.
Back to your admin panel, click on the Settings and placement page under CAPTCHA 4WP.
For this tutorial, we’ll select the login and registration form.

Lastly, scroll down to click the Save changes button. And that’s all.
We’ve enabled WordPress CAPTCHA on the default login and registration form.
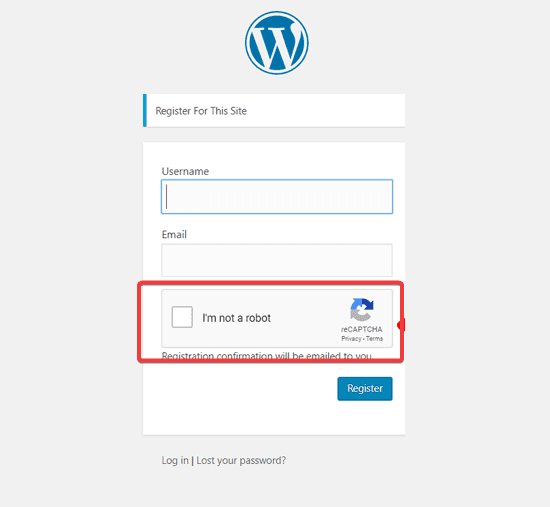
To see CAPTCHA in action, open an incognito tab on your browser and visit your WordPress admin login page.
Or simply type www.mywebsite.com/wp-admin. You should see a page that looks like this.
How to add CAPTCHA to custom WordPress forms
While adding CAPTCHA to the default WordPress login form and registration page are useful, it’s no news that there are limitations to what you can do with default forms in WordPress.
To get total control and flexibility over the interface and operation of forms on your website, you must resort to a third-party form plugin.
And if you have a WordPress website, you already have one or two form plugins.
Unlike default forms, Custom forms allow you to brand your login and registration page with colors, logos, and design that meshes best with your brand.
Next, we look at how to enable WordPress CAPTCHA using 2 of the most used form plugins, contact form 7 and WPForms.
Enable WordPress CAPTCHA with Contact Form7
Contact Form 7 is a simple, flexible plugin with over 5 million active installations.
You can add CAPTCHA to any custom form created with this plugin.
After installing and activating the plugin, a new tab titled Contact will be added to the left sidebar of your admin dashboard. Hover over it and select integration from its menu.
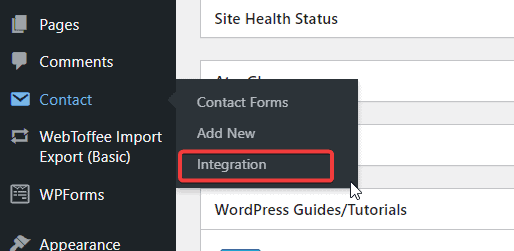
On the integration page, navigate to the reCAPTCHA tab and click on the Set up integration button.

Next, enter your Site Key and Secret Key and click the save changes button.
That’s all. Every form you create with contact form 7 will automatically have Google reCAPTCHA v3, i.e., your forms are now protected with invisible reCAPTCHA.
Enable WordPress CAPTCHA with WPForms
WPForms is another popular WordPress form plugin with drag and drop form builder.
Over 5 million WordPress websites use this plugin to create beautiful custom forms. Here’s how to add CAPTCHA to it.
After installing and activating the plugin, locate WPForms on the left panel of your admin dashboard and click on it.
Next, select settings under it to proceed to the WPforms configuration page.
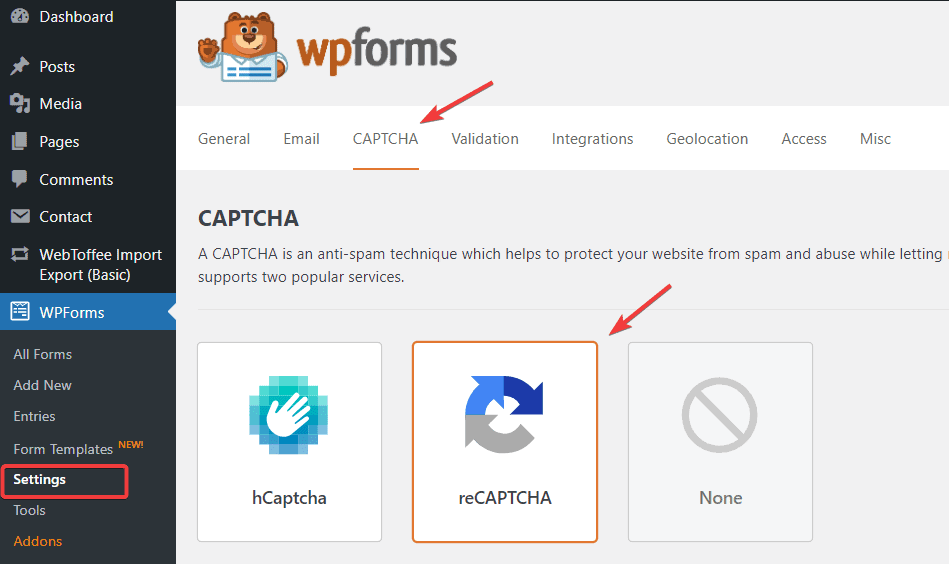
Switch to the CAPTCHA tab. You’ll see 2 CAPTCHA services, hCaptcha, and reCAPTCHA.
Select reCAPTCHA and scroll down to select reCAPTCHA type.
We’ll select Checkbox reCAPTCHA v2. Under it, Enter your Site and Secret keys into their respective fields.
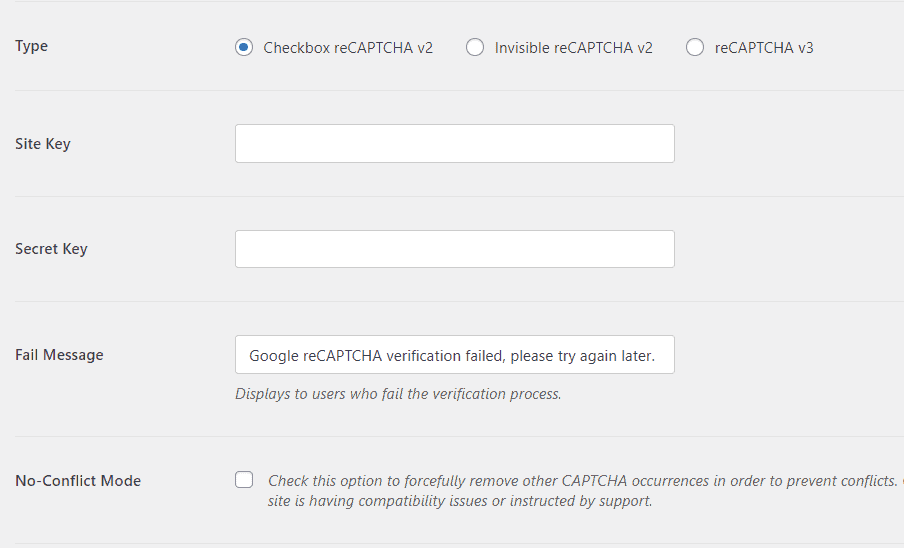
You can customize the reCAPTCHA Fail Message if you like.
Also, use the no conflict checkbox to prevent conflicts when you have more than one CAPTCHA on a single page.
Once done with the configuration, click the Save Settings button at the bottom.
And that’s it. Now that you’ve enabled reCAPTCHA in WPForms, you can add it to every form you create with this plugin.
More Helpful WordPress Tutorials:
- How To Stop Spam Comments in WordPress: Tired of spam comments on your WordPress posts? There are many ways to stop spam comments in WordPress. Learn the best ways in this guide.
- How to Use Cloudflare With WordPress: If you want to boost WordPress performance and security on autopilot. Using Cloudflare is the easiest and most reliable way. Learn how to use Cloudflare NOW!
- How to Disable WordPress Comments: Whether you want to turn off comments on WordPress as a security measure or just a preference, Find 5 stepwise ways to disable WordPress comments here.
Wrapping up
Free, easy, and straightforward, CAPTCHA is a WordPress security measure available for all.
By following the steps in this guide, you should be able to add CAPTCHA to key areas on your website without any trouble.
And as you can see, enabling WordPress CAPTCHA involves just 3 steps. Get reCAPTCHA API keys, install a plugin and implement WordPress.
That’s all it takes to prevent spammers’ assaults on your website.
We hope you find this guide helpful. If you have any questions, reach out in the comment section below.
Meta Description: