Meta tags are an integral part of SEO. If you’ve not taken meta tags seriously before now, you’re in the right place.
This post will teach you how to add meta tags to your WordPress website.
The focus of most SEO endeavors is on adding keywords into content and link building, and rightly so.
While these strategies provide plentiful benefits, the smart use of meta tags is akin to the cherry on the SEO cake.
Proper use of meta tags can catapult your website higher on search results, leading to potentially higher traffic for your website from better organic click-through rates.
This guide provides how you can turbocharge your SEO efforts with meta tags.
What are Meta Tags?
Meta tags are HTML elements you can add to the HTML code of your website.
They are information or instructions you leave for search engines.
Meta tags provide Google and other search engines insights into the kind of content you publish, which can then influence where your posts rank on search engines.
For example, if you publish content about apples, the fruit, tweaking your meta tags is one of the ways to let Google know that you are not talking about Apple, the company.
Below is an example of a meta tag:
<html>

<head>

<meta name="description" content="Build and grow a blog on a budget.">

</html>

</head>
Types of Meta Tags
There are about 15 types of meta tags, but the four you should know about include:
- Title
- Description
- Robot
- Viewport
1. Title Tags
A title tag spells out the title you’ll like search engines to display on a search results page.
A user can use your title tag to determine if your page could be the answer to their query as they scan through the results of their query.
Often, people use the title of their content as the title tag.

However, that shouldn’t always be the case because there’s a limited space for your title to appear.
The recommendation is to use a maximum of 60-65 characters for your title.
One of the best ways to optimize your title tags is to think of your audience and their search intent.
Why are they looking for this information?
How does your content help them in this regard?
2. Description Tags
Description tags allow you to give users a preview of your content.
It’s a brief snippet underneath your title tag on Google search result pages.
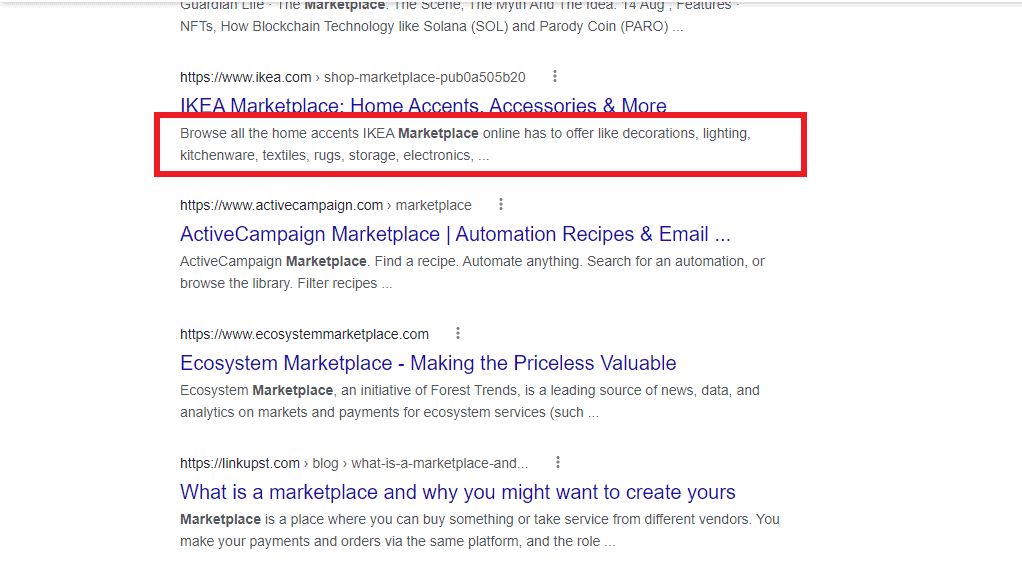
See the description tag as a way for you to summarize what your post or page contains.
After doing the hard work of appearing favorably on search results, you also need to help the user choose your content over others.
It’s good practice to include the primary keyword in the description tag.
Also, keep it simple and short, less than 160 characters and preferably above 140 characters.
Google uses “robots” or automated tools to scan and index pages.
An indexed page means Google crawls (scan) and stores details about that page and is one of the pages Google will examine to provide results to search queries.
You can use the robot tags to tell Google how you want your website or posts indexed.
While there are others, the five key parameters you need to learn when it comes to the robots tag are:
- Noindex: Tells Google not to index your post or page.
- Index: Does the reverse of noindex.
- Follow: This tells the search engine to follow all the links in the post and then pass equity to the websites linked. Think of equity as a stamp of approval on the page you linked.
- Nofollow: Does the reverse of the “follow” parameter.
- None: This is similar to using noindex and nofollow concurrently.
The default instruction is for Google to “index” and to “follow.”
4. Viewport Meta Tag
Viewport meta tags help you set up how your website will adapt to different screen sizes (desktop, mobile, and tablets).
Adding a viewport meta tag is one of the keys to having a mobile-responsive website, which is one of the considerations Google uses in ranking websites.
How to Manually Add Meta Tags in WordPress
If you fancy a bit of coding and digging under the hood, you can add meta tags by editing the header.php file.
Here’s how:
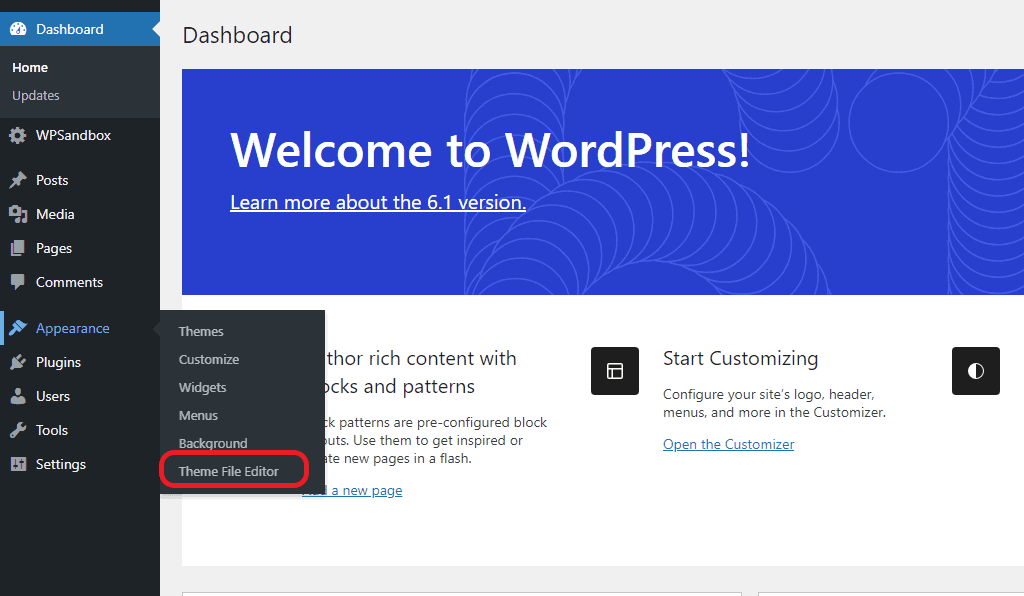
From your website’s WordPress dashboard, hover on “Appearance” and click “Theme File Editor.”
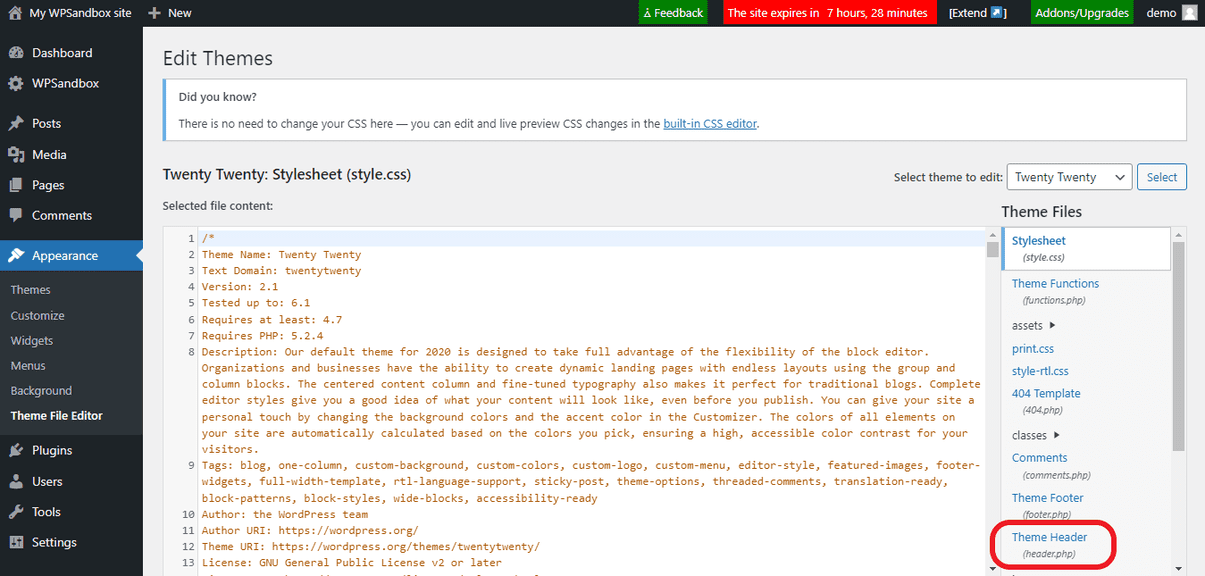
Click “Theme Header” from the bottom right-hand corner. If you can’t see the theme header option, scroll down.
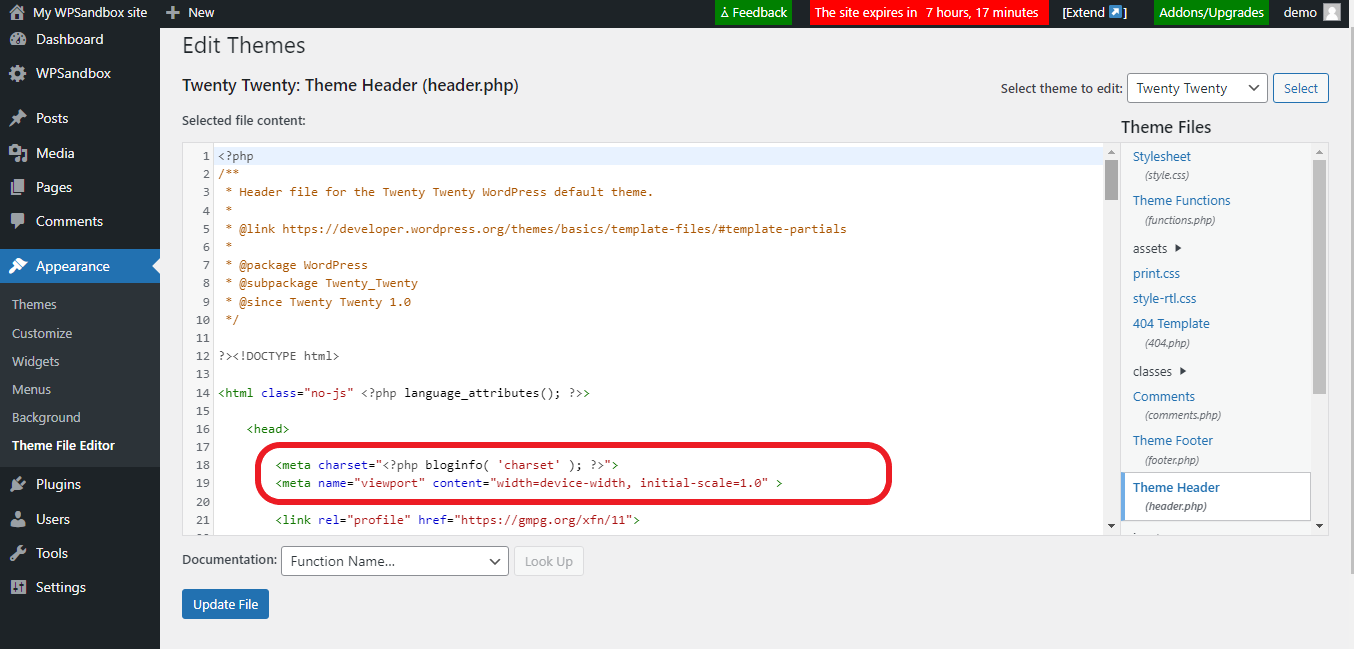
Add your meta tag code between the <head> and </head> tags.
For the theme we are using, there are already two meta tags.
We’ll add title, description, keyword, and robot meta tags too.
Add the meta tags as shown in the image below.
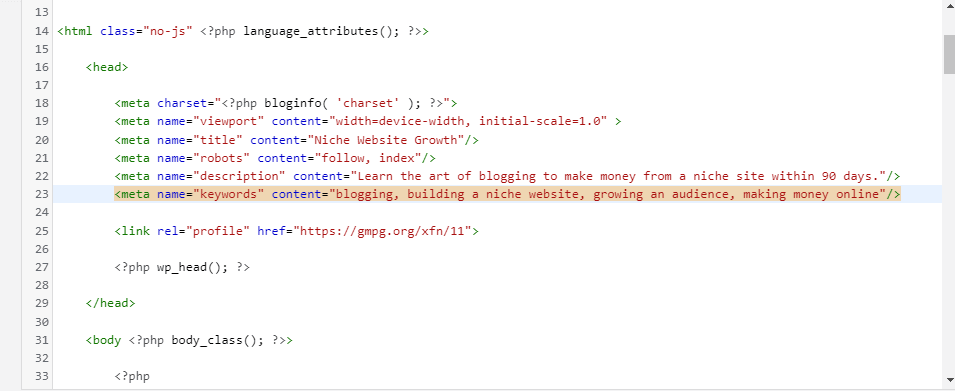
Click the “Update File” button at the bottom of the page to finalize your edit.
How to Add Meta Tags in WordPress With Plugins
You can also alter meta tags with the help of plugins.
We recommend using plugins anyway because they’re easier and faster, especially if you’re not technically inclined.
Most plugins designed for SEO purposes will provide this service for you.
Some popular options include Yoast SEO, the All in One SEO (AIO SEO) plugin, and Meta Tag Manager.
How to Add Meta Tags With the Yoast SEO Plugin
The Yoast plugin is particularly effective in optimizing the meta title and meta description of your posts.
To use Yoast, follow the steps below.
Install and activate the Yoast plugin if you haven’t already.
Dashboard > Plugins > Add New > Enter “Yoast SEO” in the search bar > click on the “Yoast SEO” plugin to install and activate.
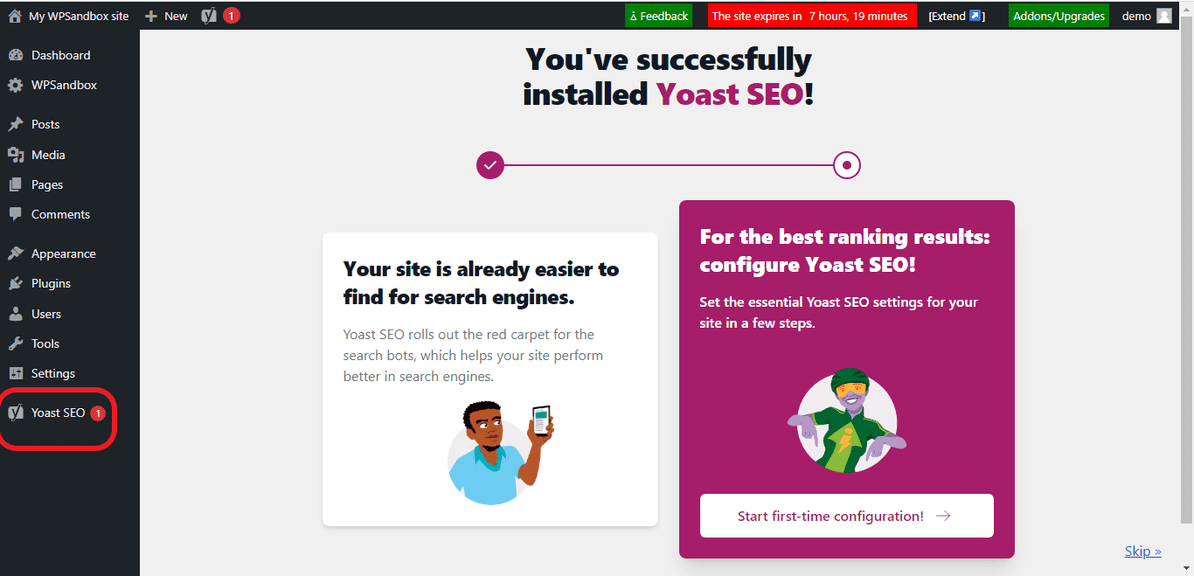
Whenever you’re creating a new post, you’ll have help from Yoast to make your post more SEO-friendly.
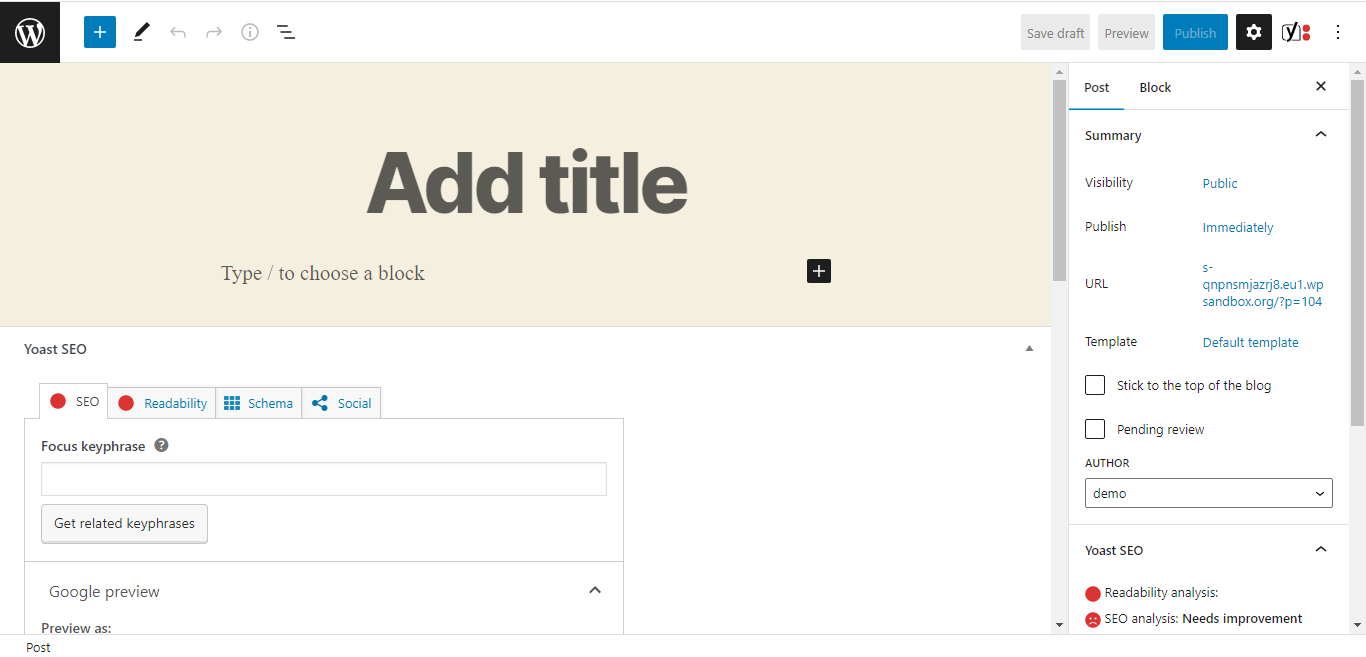
Add your primary keyword into the “Focus keyphrase” textbox.
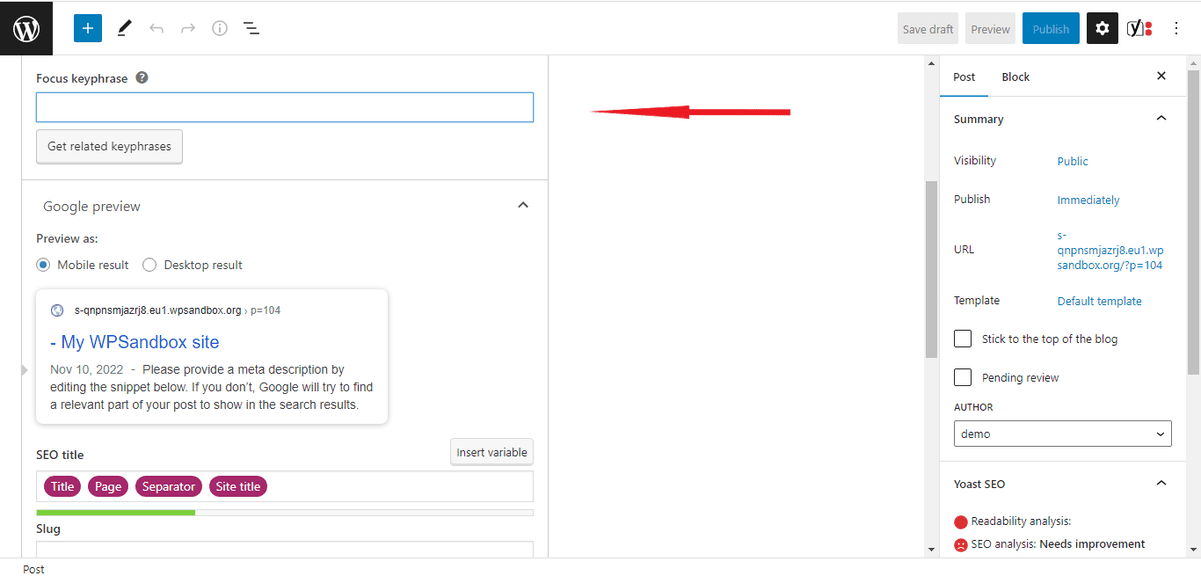
Next, add a title for your post by editing the SEO title text box.
As you add text to the title and description box, you’ll see a preview of how it’ll appear on search results.
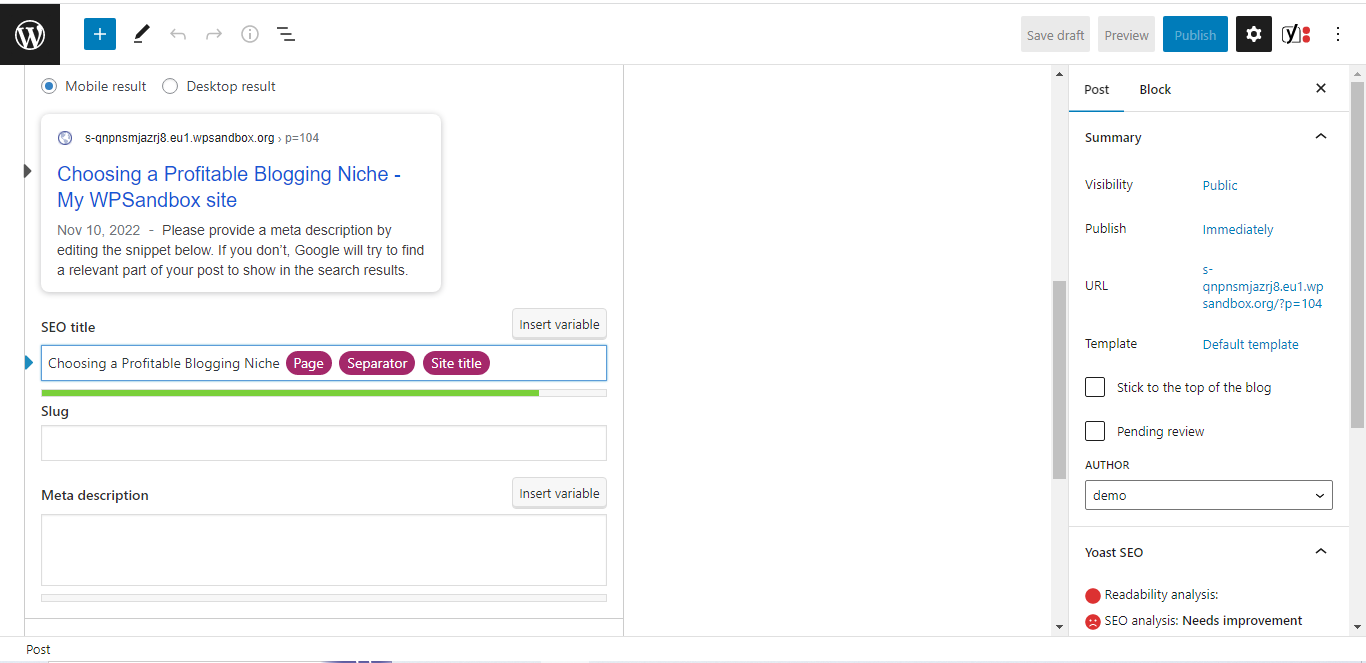
You can also edit the site title in the same vein.
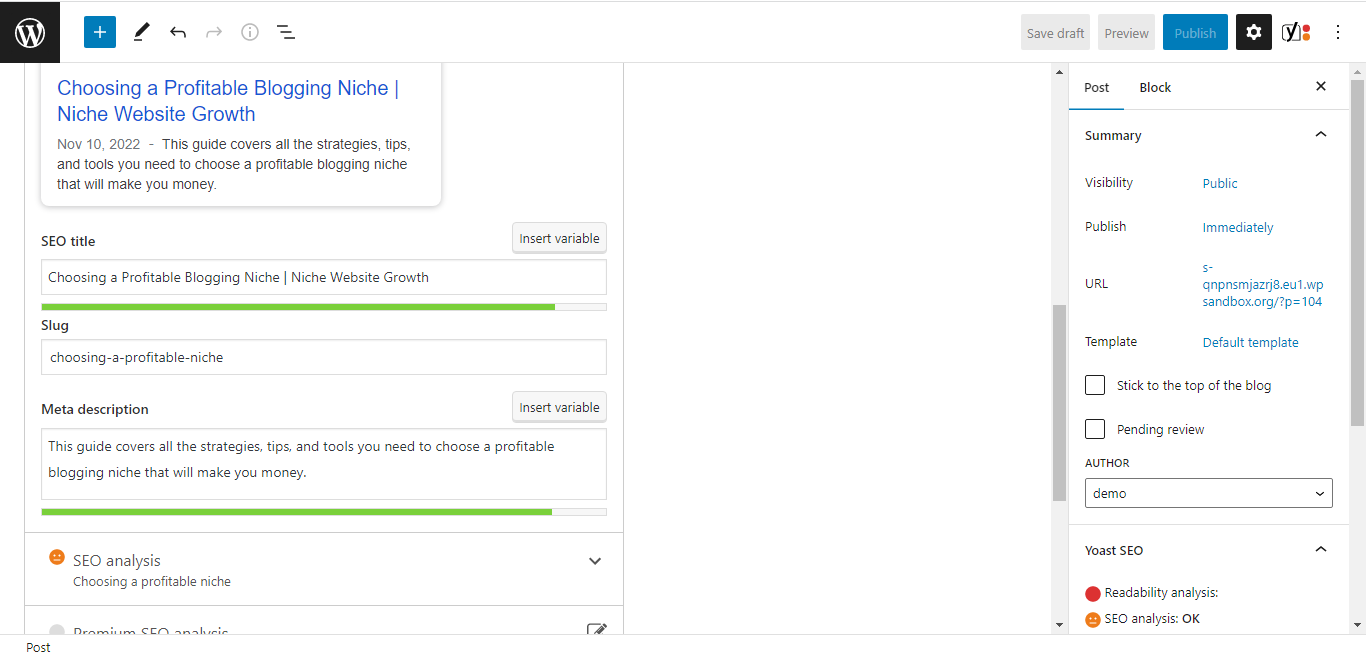
Add the meta description and slug.
The slug refers to what’s added to your website URL for that post.
In our example, our website is NicheWebsiteGrowth.com.
Our new post is titled “Choosing a Profitable Niche.”
Our slug can be choosing-a-profitable-niche, then the link to our post becomes www.nichewebsitegrowth/choosing-a-profitable-niche.
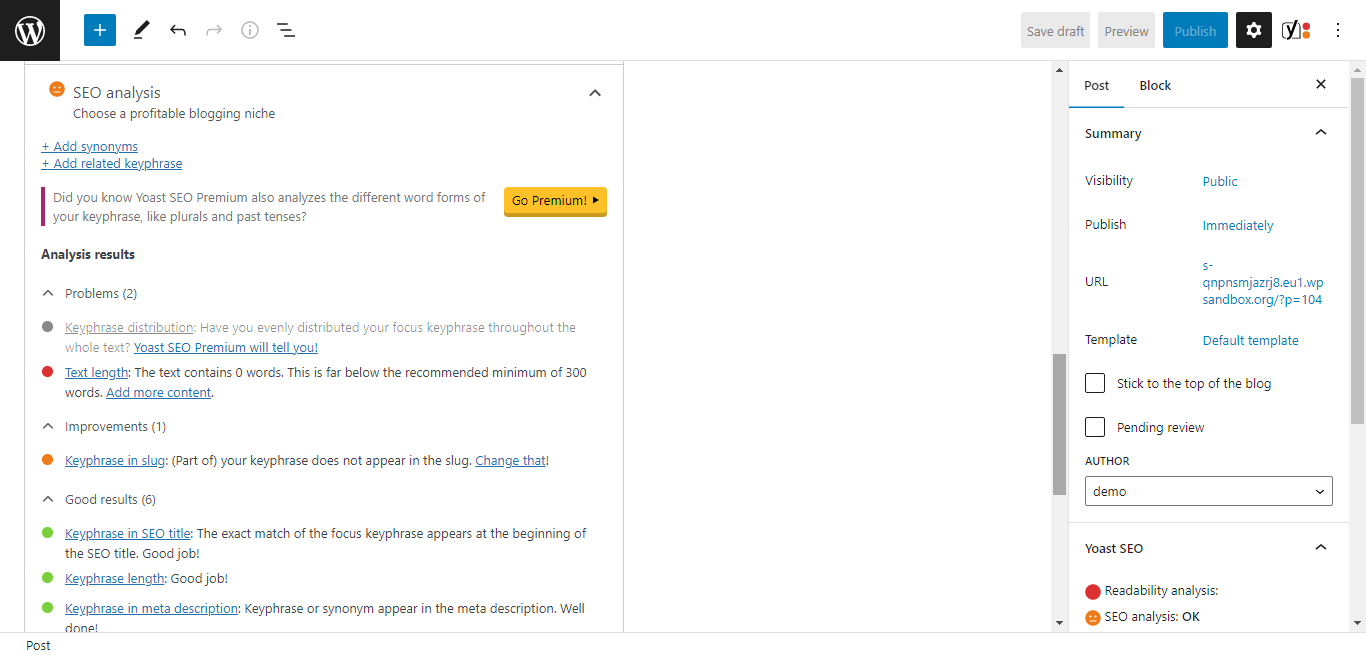
You can click on SEO analysis for other recommendations on optimizing your post for search engines.
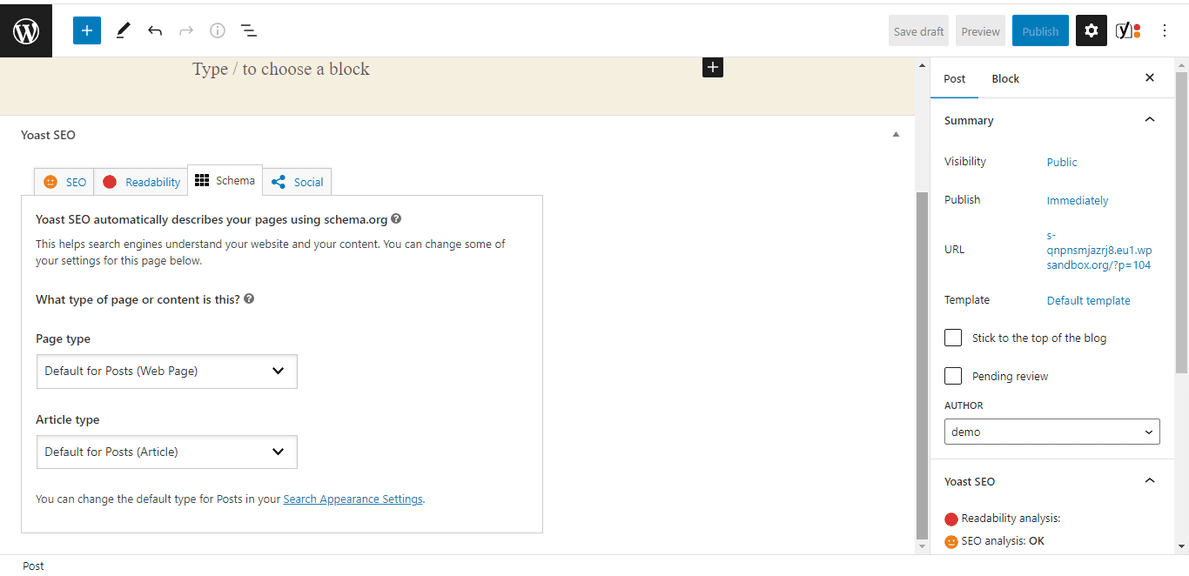
We also recommend you edit the “Schema” of the post you’re creating.
Schema allows you to specify the type of page (contact page, about page, FAQ page, etc.) you’re creating.
If it’s a regular post, you can also include the type of article (scholarly article, tech article, report, news article, etc.) it is.
Wrapping Up: How to Add Meta Tags in WordPress
Meta tags perform a twin role in improving your ranking on search results and increasing your clickthrough rate.
The easier and faster way to make changes to meta tags is by using plugins like Yoast SEO and Meta Tag Manager.
If you know about writing HTML code, you can give editing the header.php file of your WordPress theme a twirl.
It’s not enough to write quality content.
You need to put your content in front of eyeballs, and SEO is the primary way to do so.
Meta tags contribute in this regard.
You should add it to your blogging repertoire.
If you have any questions or want to share your experience with meta tags with us, feel free to share them in the comments.
We’ll love to hear from you.


